This bulletin, released by GM, applies to a broad range of vehicles. Shortly after a tire (or multiple tires) has been mounted to a wheel and properly balanced, the customer may complain about a vibration.
Wheel slip may have occurred, where a tire slips and rotates slightly on the rim during acceleration or braking. This may be most common on clear-coated or chrome plates wheels with very smooth bead seat areas, but may also occur on other alloy or steel wheels. The slippage results in the balancing job being negated.
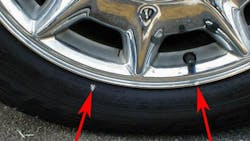
Wheel slip normally occurs for excessive amounts of lubricant applied in the wrong locations, and/or improper lubricants or improperly diluted lubes that contain excessive moisture or components that do not dry sufficiently. One way to check for a slip is to place a temporary mark on the tire in line with the valve stem. After driving the vehicle (perhaps using acceleration and/or hard braking), if the wheel has slipped more than 1 inch, the vibration is likely caused by wheel slip. This diagnostic test will only be effective if the vehicle has been serviced within the last couple of hours.
Tips on preventing wheel slip:
- Prior to tire installation, clean the tire changer’s wheel contact parts of excessive lubrication, dirt, etc.
- Clean the wheel’s bead seat areas of any leftover lube that was used to demount the tire.
- Inspect the tire to be installed and clean any manufacturer-related lubricants from the bead seat areas. Use an approved rubber cleaning fluid that would commonly be used during a tire repair.
- Do not use products containing silicone, alcohol, petroleum based products, solvents or corrosives for cleaning and lubrication.
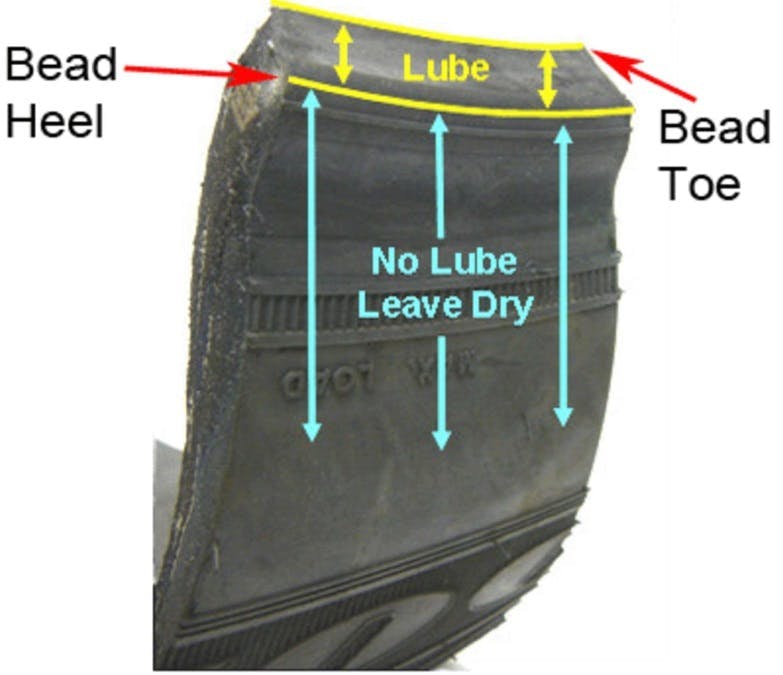
- Lubricate the tire and wheel. To eliminate wheel slip, the tire beads should normally only be lubricated from “heel to toe.” Lube applied outside of the heel-to-toe zone will cause the tire to have reduced grip on the wheel. When lubricating the wheel, lube the safety humps and leave the rim flanges dry. Lube the drop center area only for difficult-to-mount tires.
- When additional lube is required during mounting to prevent tire damage, the excess lube should be wiped/cleaned from the tire bead seat area before inflating the tire to seat the beads.
- Tire mounting must be completed within 10 minutes of the application of mounting lube. Evaporation of the lube after 10 minutes may prevent proper bead seating.
- Inflate the tires to 40 psi when mounting, then reduce to desired operating pressure.
- Place a temporary mark on the tire at the valve stem. Balance the assembly and mount to the vehicle.
- Park the vehicle for one hour to allow lube to evaporate. Do not accelerate quickly or brake hard when moving the vehicle to the parking area.
- Test drive to confirm the vibration issue has been resolved. In a perfect world, the vehicle should not experience abrupt acceleration or hard braking for 24 hours.
About the Author
Mike Mavrigian
Motor Age Editor
Mike Mavrigian has written thousands of automotive technical magazine articles involving a variety of specialties, from engine building to wheel alignment, and has authored more than a dozen books that crisscross the automotive spectrum. Mike operates Birchwood Automotive, an Ohio shop that builds custom engines and performs vintage vehicle restorations. The shop also features a professional photo studio to document projects and to create images for articles and books.


