Your first car of the day is a routine oil change, and if you’re a professional, that routine service includes a visual check of key vehicle systems.
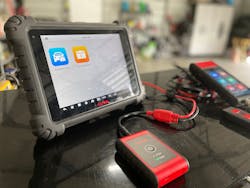
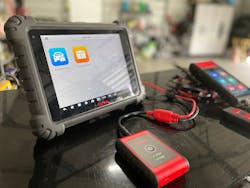
You’ll check the fluids, look at the belts and hoses, and air up the tires. But one of your first steps should be connecting your scan tool.
Why? For some time now, our collision repair cousins have been required by the major insurance carriers to perform a pre- and post- full system scan of all the computer-controlled systems on the vehicle they are repairing.
The pre-scan is used in the estimate phase to identify everything that is wrong with the vehicle prior to repair, while the post-scan is used to verify all the vehicle’s systems are functioning as designed prior to release to the customer.
The idea is to ultimately save the insurance company money and to increase customer satisfaction with the final repair. We can learn a lesson from that and apply that to our own customer service needs.
Over the last decade or so, I’ve encouraged all of you to give your customers the full benefit of your training and experience. I’ve repeatedly explained the need to perform a thorough visual inspection and how important it is to advise your customer of anything you find that requires attention. Not just for the added business - that’s secondary. The main reason for doing so is a matter of ethics, doing what is right for your customer, and giving them the full benefit of your training and expertise. Today, that need goes beyond the visual.
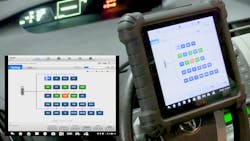
We, too, should incorporate a full-system scan in our normal inspection process. Doing so allows us to keep the customer informed and to help them make good decisions regarding their vehicle’s upkeep. Performing a full system scan requires a scan tool with enhanced, that is OE specific, software and it takes very little time. The report can be downloaded and shared with the consumer in person, by email or by text message. Be sure to keep a copy for your customer records!
Battery testing
Batteries are increasingly the cause of a variety of drivability and electrical issues and spotting a battery that is soon going to need replacement is a very real service to offer your customer.
If you live anywhere the temperatures drop this time of year, you could be preventing your customer from becoming stranded by a battery that can’t start the car. And just like the full-system scan, the test is simple. Just choose the battery check from the main menu and follow the prompts!
Just like the scan report, be sure to save the test results and share them with your customer - good or bad - and keep a copy for your records as well.
But we’re not done.
With a capable tool, we can perform a few other quick diagnostic checks that can help our customers catch problems before they get bad while adding potential revenue to our shop. If the enhanced mode allows, perform any or all of the following tests: relative compression, power balance, and injector flow. In other words, whatever tests are available to you to assess the mechanical condition and overall performance of the vehicle, make them!
And if you are using a scope for your problem diagnostics, consider applying those skills to uncovering problems before they arise.
Most of the more popular scan tools include scope modules in them - making it easy to switch over to use the scope to perform the relative compression test using nothing more than a basic connection to the battery.
To perform this test, connect one channel of the scope to the battery as you would for any voltage measurement. Turn on your scope’s “AC Coupling”, select the 5V scale and use a time sweep of one second. I’m not interested in the actual voltage reading. I want to see the variance in voltage as the engine is cranked over.
Since I usually work alone, I like to use the Single trigger function. Set it for a rising or falling slope but set the voltage level for the trigger to 0.2V. Disable the full system, start the scope, and crank it over. You should see a pattern like the one here. Any weak cylinder will not pull the voltage down as much as a healthy one, so any that look short could indicate a mechanical issue in that cylinder.
Again, this not only offers a real service to your customer, but it also offers the opportunity to become more familiar with your tool. It’s always best to learn on “known good” rather than wait for a problem vehicle to come along.
The visual inspection we use to check the overall integrity of our customers’ vehicles will always be necessary but with the advent of more and more electrified systems and the increase of enhanced safety systems, the only way to thoroughly assess the vehicle’s condition is by way of a full-system scan.
Adding in the other steps I shared only enhance that level of thoroughness.
About the Author
Pete Meier
Former Creative Director, Technical | Vehicle Repair Group
Pete Meier is the former creative director, technical, for the Vehicle Repair Group with Endeavor Business Media. He is an ASE certified Master Technician with over 35 years of practical experience as a technician and educator, covering a wide variety of makes and models. He began writing for Motor Age as a contributor in 2006 and joined the magazine full-time as technical editor in 2010. Pete grew the Motor Age YouTube channel to more than 100,000 subscribers by delivering essential training videos for technicians at all levels.
Connect with Pete on LinkedIn.


