This bulletin applies to 2014 Chevy Silverado and 2015-2018 Silverado, Suburban and Tahoe vehicles. Some customers may comment on one or more of the following conditions:
- Reduced or loss of power steering assist (only LD models equipped with electric power steering)
- Steering wheel jerks or kicks back when turning
- Service Stabilitrak message with warning chime
- Engine stall
- IPC going blank or inoperative
- Radio/ICS gojng blank
- HVAC going blank
- Hood ajar message and/or dome lamps flash when shifting into reverse
- Alarm sounds when locking doors or door locks cycling
- Wipers continue to run for a short time after turning off and then stop/park in the incorrect location.
Technicians may find one or more of the following DTCs set:
B1325, B124B, B124C, B127B, B127E, C0544, C0710, C0800, P0513, U0020, U0073, U0077, U0078, U0100, U0101, U0102, U0121, U0126, U0131, U0140, U0155, U0164, U0415, U0422, U0428, U0452, U1509, U150F and/or U15E1.
This condition may be caused by battery cables with high resistance and/or loose connections at the positive or negative battery cables or at the battery fuse block. The condition may also be caused by a poor BCM ground at G218. Another possible cause is a shorted B+ battery cable at the starter solenoid caused by a loose starter shield contacting the starter battery cable terminal ring or a starter cable ring terminal that has been mis-installed and/or rotated when installed. The condition may also be caused by a discharged or faulty battery.
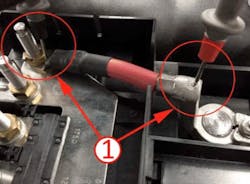
Perform a loaded voltage drop test on the short positive battery cable. Perform a loaded voltage drop test on the negative battery cable.
Refer to “Measuring voltage drop” in the service manual. If the voltage drop is above 200 mV, replace the affected cable(s). It is imperative that both the positive and negative battery top, posts protrude above the battery cable clamps 0.040 – 0.080 inch to be properly installed.
Check both positive and negative battery cable clamp nuts and make sure they are properly tightened to 62 in-lb. After each cable clamps are fully installed and tightened, grasp each battery cable neat the battery post and make sure they are secure and do not spin on the posts. If they do, replace the cables.
Inspect the battery fuse block cable connections for looseness. Torque these to 11 ft-lb. Inspect the negative battery cable where it connects to the engine block and make sure it is not loose by grasping the cable near the eyelet and verify that it does not rotate. Torque this to 33 ft-lb.
About the Author
Information courtesy of Mitchell 1
Information for Technical Service Bulletins comes from ProDemand, Mitchell 1's auto repair information software for domestic and import vehicles. Headquartered in San Diego, Mitchell 1 has provided quality repair information solutions to the automotive industry since 1918.
