6 tips for getting the most from your jump starter
Your jump starter, whether it contains a lead-acid AGM battery or a lithium-ion battery, is a perishable product. From the first time a battery is charged, it is constantly undergoing microscopic chemical changes, all of which march it toward its demise. But, that march can be very slow or very fast, largely depending on how you treat it (and the overall unit). Keeping the below steps in mind could extend the life of your jump starter as much as 2-3 times longer than if they are not followed.
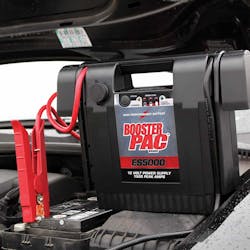
1. Keep your jump starter charged
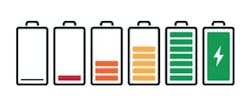
Avoid situations that result in the unit sitting in a discharged state for long periods. Lead-acid jump starter batteries have no memory issues and cannot be harmed by frequent charges, even when only slightly discharged. Even lithium batteries are always better served by frequent charging than infrequent charging. The best practice is to charge a jump starter after each use. Even in those cases where this type of charge frequency is unrealistic, nightly charging should be done if the unit is used frequently. In those cases where the jump starter is not regularly used, charge it every 3 months to ensure that the battery is not sitting in a discharge state for extended periods, no matter what type of battery is inside. In periods of extreme cold, where the jump starter is left in a vehicle parked outdoors overnight, charging once per month is recommended.
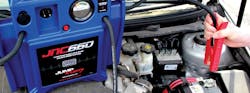
2. Respect the duty cycle of your jump starter

Every jump starter is subject to a duty cycle in which the vehicle can be cranked for a short amount of time and then requires a period of rest – see your operator’s manual for the specific details of your jump starter. For almost all Clore Automotive jump starters, the recommended duty cycle is 6 seconds of cranking followed by 3 minutes of rest. This will avoid excessive heat build-up within the jump starter battery, which can damage its internal construction and reduce its useful life. In the case of lithium jump starters, this required rest is built into the software (for Clore products) to make it easy to avoid damaging the unit.
3. Store at a moderate temperature

Whenever possible, store your jump starter in a moderate temperature environment, between 50 degrees F and 70 degrees F (10-20 degrees C). Like vehicle batteries, exposure to extreme temperatures is detrimental to jump starter batteries, both in the short term and long term. For instance, a jump starter stored at 20 degrees F will have less jump-starting power for a needed jump-start than one stored at 60 degrees F. We realize that, in many parts of North America and the world, storing your jump starter in a vehicle means storing it in temperatures well below 50 degrees F. We get calls on this all the time. In these cases, your jump starter should serve you just fine. Please see our note in number 1 above regarding charging frequency in extreme cold spells. Also, if your low is going to be -30 degrees F overnight and you have a critical event the next morning, it is probably a good idea to bring your jump starter in for the night (better safe than sorry).
4. Disconnect
When you have completed a successful jump-start, it is important to disconnect the jump starter from the now running vehicle as quickly as possible, always remembering to follow all safety procedures and the proper disconnection sequence. Typical vehicle alternator output is much higher than the recommended recharge rate for any jump starter battery. Charging a battery (any battery) at a rate greater than the recommended charge rate is detrimental to its long-term health. Many technicians leave the jump starter connected after a successful start, thinking that it is a fast and easy way to get the unit recharged, but this practice should be avoided. For lithium units, again, this protection is usually built-in (it is on our models), such that once the jump-starter verifies the vehicle has started, it will (internally) disconnect itself from the vehicle to avoid overcharging.
5. Safety

Following all recommended safety procedures is not only best for your personal safety and the well-being of your vehicle, but it is also best for a long jump starter life. We know it’s a hassle to find a proper engine or chassis ground to which to connect the negative jump starter lead. But, it is way safer to make the effort, plus it reduces potential damage to your jump starter. Other safety steps also reduce the likelihood of putting the jump starter in a compromising situation. Even if your jump starter (and vehicle) survives a reverse polarity near miss, it can take a toll on the battery’s state of health and reduce its lifespan. Take your time. Do it right – your jump starter will be glad you did.
6. Maintenance

Until now, our focus has been on the battery, which is the heart of a jump starter and the most critical component impacting its durability and service life. That said, other factors should be kept in mind. Remember that many of the batteries your jump starter comes into contact with are in poor condition, which can result in battery acid and corrosion on or around the posts. After jump-starting a vehicle with a battery in such a condition, wipe down your clamps (particularly the positive, which is the only clamp that should contact the battery) with a clean cloth to remove any residual battery acid. For clamps that have a high level of acid contact, a mixture of baking soda and water can be used with a wire brush.
Following these simple steps can greatly extend the life of your jump starter and also help to ensure that your jump starter is ready for service each time you need it.
Information provided by Clore Automotive
About the Author

Jim O'Hara
Clore Automotive
Jim O'Hara has over 25 years of experience in the Tool and Equipment industry, including 20+ years at Clore Automotive. At Clore, he heads up the marketing team and is directly involved in the development of new products and enhancements of existing products.