Content brought to you by Motor Age. To subscribe, click here.
What You Will Learn:
• A loaded 5V reference circuit can cause communication faults
• Referencing a wiring diagram before approaching an electrical fault will save time
• Low or no voltage present at a test point could be due to an open circuit or one which is shorted to ground
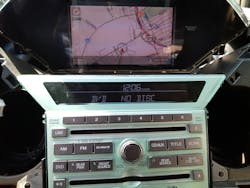
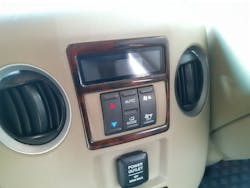
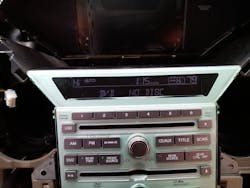
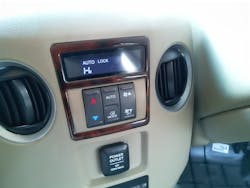
I was called to a shop and faced a 2011 Honda Pilot boasting about 180,000 miles on the odometer. The customer complaint was no control over the HVAC temperature (In either the front or rear of the car). An accompanying complaint was the temperature displays being blank on both the front and rear HVAC units (Figures 1+2). Upon my arrival and before confirming the complaint, the shop informed me they replaced the front and rear HVAC control units with used units, to no avail.
First impressions
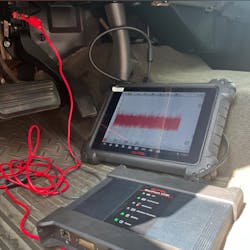
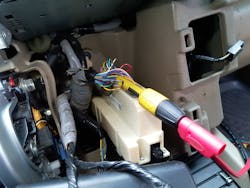
Upon entering the vehicle to confirm the complaint, I saw it was dismantled, yet all of the components were still plugged in (Figure 3). When computers have been replaced and the same concern is still present, I like to reinstall the originals if it’s not too time-consuming. My main focus is speed and accuracy with every single movement and second of thought I put into diagnosis. Time is money! So, when it comes to used, remanufactured, repaired, or even new modules, we have all seen our fair share of lost time due to faulty units right out of the box. I recently diagnosed a Mercedes-Benz with a faulty ECM sourced from the dealer. After three visits to this car, I considered the possibility of the ECM being defective only by verifying the operation and integrity of literally every other related component. After replacing the ECM again, the vehicle was fixed. Anything (including my equipment) can be faulty and needs to be verified.
Starting with a clean slate
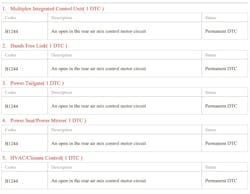
So, after reinstalling the original HVAC control units and confirming the complaint I performed a vehicle system scan of all the modules and found fault codes stored in five modules (Figure 4). After saving the scan PDF to my scan tool, I cleared all faults out of all the modules. Then a second system scan (after a key cycle) yielded me a total of 55 codes (Figure 5). Both scan reports had one DTC in common in multiple modules (Figure 6).
A fork in the road
Is it possible the main complaint of no temperature control is associated with the fault I found? Or could there be an additional problem with the vehicle? This is where the analysis of data becomes paramount. The scientific method tells us that we must look at the data before drawing a conclusion. I must say in all honesty that following this process is not something I was able to do overnight, nor did I stay with it consistently in the beginning of getting into diagnostics.
Yet after time, trial and error, and, as a great man once said, “not giving up,” I have been able to use this very method all day and every day. And not only does it feed my family, I get to live out a once distant dream of doing mobile diagnostics.
Direction? Well the problem has directly affected the module and its ability to function, and the fault code is reported by the same module. If the module is functioning properly, the 5V reference circuit to the door motor position sensors should be present and accounted for.
This is also a great technique for driveability diagnositcs (As if there is a no-communication concern with a PCM, for example). It will help you determine that unit or module is alive and working properly. If the reference circuit is shorted versus not present, it can help tell you if you need to check for an input problem or an output problem.
So before going crazy with checking voltage and ground supply, etc., my next test was on the 5V reference circuit in the HVAC control unit, knowing that it will tell me a lot about a module and it's inputs and outputs.
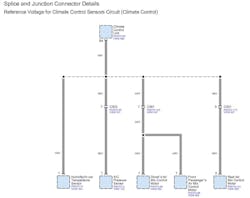
After viewing the wiring diagram for the 5V reference circuit, I was then able to see which components it supplied, including the rear air mix door (Figure 7). I connected my scope ground to the battery negative terminal and tested the connection by going to battery positive terminal with the other test lead (As I stated before, I suspect everything to be a potential problem). I have had to repeat quite a number of tests in the past because my equipment was not properly grounded.
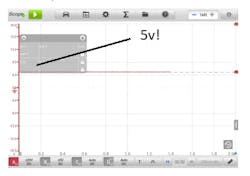
After proving the scope’s functionality, I then connected my scope up to the gray wire at cavity B4 of the HVAC module (Figure 8). Right away, I noticed a problem, as the reference circuit was down to 0V (Figure 9). My next thought was... is this 5V reference circuit shorted to ground, or is it open/no output from the HVAC module?
Now, I could be thinking at this point that the 5V reference circuit is simply open/no output from the HVAC module. I knew the actuator is where I was headed. Why? If the reference circuit were open, we would certainly have a multitude of open circuit/circuit low faults. The wiring diagram showed that the reference voltage supplied a few players in the HVAC system. It has been my experience that in some — but not all — cases where there is a shorted reference, it will most definitely affect the module emitting it, especially with its DTC logic. And in others, as I mentioned earlier, it is common for a shorted reference to put a Chrysler PCM to sleep and not allow communication (among others). At this point, I truly couldn’t tell if the circuit was shorted or open. However, there is a very easy and logical way to tell.
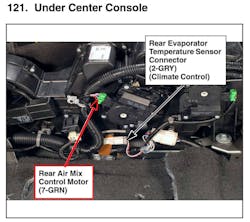
So, I figured the rear air mix door actuator position sensor (internal to the actuator assembly) would be the likeliest suspect for this problem (Figure 10). After unplugging the actuator, the 5V reference returned and the HVAC temperature displays came back to life (Figures 11, 12 + 13). Also, the temperature settings are now controllable from the front and rear HVAC displays.
I cannot stress enough how important it is for me to follow a laid out process for my diagnosis. As it is very easy to become frustrated and confused with troubleshooting. Especially in a case as this one where a multitude of possible faults can be the culprit of the same symptom. A faulty HVAC control unit? A faulty front display, or temperature sensor? Perhaps even a faulty BCM? These are components that come to mind when I think about this case without the use of the scientific method.
I have spent a lot of time in years past “lost in the weeds" due to the shotgun approach of troubleshooting. Especially when we have been servicing cars long enough that we can see common problems, we may say to ourselves "that sounds like its the..." Many of us (including myself) have gotten along by firing the parts cannon.
What about the times when the problem is not the usual suspect? My experience, more often than not, hasn't been the usual suspect. One thing I can say for sure is that it was the frustration that made me get further into honing my skills as a diagnostician. The solution for me has been the use of this scientific method. There is no process on Earth like this one. It is something that is learned by all parts of the mind and body.
Diagnosis begins with the aquistation of data and using that data to ask a question. And that data and those questions are different for each problem I face. In this instance, What can cause the temperature displays to be blank? A list of things comes to mind, but while asking that question and looking at the data my equipment is giving me, I start to get answers.
A list of potential answers to that question come at this juncture. Most of them come from simply sitting in the driver's seat right from my scan tool. But we have to ask the right questions to follow the first. Is this problem constant? If so, then what are the faults stored in memory? Again, we had a multitude of faults stored in various modules. Clearing them and rescanning the car showed one clear fault.
Let's say if this problem was not consistent and we cleared the faults and none came back (which happens quite often). We would be most likely stopping and attempting to get the fault to return crossing our fingers it did. It would be at that point, I would have to leave and return when the problem is consistent.
In the past, I have lost time chasing an intermittent fault (that was not present at the time), only to find I was better off walking away. If I cannot locate the issue in a timely manner, I am doing a disservice to the shop and customer. I have learned to return to the car when the concern is there.
However this car was a "hard" fault. And like a game of wack-a-mole, the rear actuator was sticking its head up. It was a quick, simple diagnosis thanks to the process I mentioned. The faults stored in memory led me to the cause of the problem, yet I've seen cases where fault codes do not lead you to the problem.
My secret to success
The process ALWAYS stays the same, even though the problems change. The HVAC displays may have been drawing a blank, but that didnt mean I had to. Collect data, ask the right questions, trust your equipment, remain teachable, and love what you do are my life mottos. Thank you for reading.
About the Author
Rene Mejia
Rene began his journey working on cars at the age of 15. He attended and graduated from the automotive program at Morris County School of Technology in Denville, New Jersey. He continued working as a mechanic until 2011 when he began operating a busy repair garage in Hackensack, New Jersey.
In December of 2022, Rene established Final Stop Mobile Auto Tech, LLC, to pursue his dream of conducting mobile automotive diagnostics and to help others.
