The importance of having the right connections
Content brought to you by Motor Age. To subscribe, click here.
Success often seems to have a lot to do with having the right connections. While people connections in business and social realms are important, professional auto techs have another equally important set of “connections” to focus on...electrical connections! This month, we'll take a detailed look at vehicle electrical/electronic systems and their related terminals, connectors, and splices to find out how we can diagnose common problems, while avoiding mistakes along the way.
Connectors are everywhere!
Electrical connectors exist for two reasons – manufacturability and serviceability. Today's vehicles contain thousands of terminals in hundreds of connectors to speed assembly and enable component replacement and diagnostics. Let's decode some common acronyms and define some terms in the world of electrical connections. As we explain each term, we’ll include some practical information to help you keep your customers’ vehicles well connected!
Terminals – new PC terms!
Terminals are the metal ends (terminations) of an electrical circuit (wire) and they are usually plated with an alloy/metal to aid in resisting corrosion. Terminals are traditionally referred to as female (a square, rectangular, or round opening/end) or male (solid square, flat, or round pin). More recent PC (politically correct) names for terminals are pins (referring to male terminals) and sockets (referring to female terminals).
Connectors/plastic housings
Plastic housings (a.k.a. connectors) for metal terminals to latch into ease disconnecting (and reconnecting) an electrical component from a wiring harness. Connectors can have hundreds of terminals within them or only a single terminal. Use caution when releasing terminal latches to remove a wire from a connector. The correct tool and correct amount of force are equally important when it comes to preventing damage to a terminal latch.
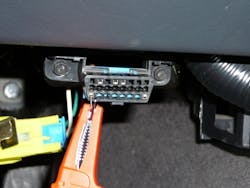
CPA – Connector position assurance
A plastic key/tab (Figure 1) that assists in keeping one end of an electrical connector to the other end.
TPA – Terminal position assurance
Plastic key/tab that assists in keeping a terminal latched into place inside a connector
Terminal retainers
These plastic inserts (Figure 2) inside the main connector housings serve as a divider and anchor to secure individual terminals in place. Small plastic barbs on the connector assist the retainers in locking in place. On connectors with an abundance of wires/terminals, care and diligence must be exercised whenever removing a plastic connector's retainer. Multiple wires/terminals might fall out of place in the connector, which can lead to mixing circuits up within a connector upon reassembly.
Environmental seals
Seals keep out moisture and other forms of contamination. Typically made of silicone (rubber), these seals range from single seals at the end of each wire to a larger seal internal to the connector. Both are often used in locations where the connectors are prone to water intrusion.
Wire/terminal crimp
The method/process used in attaching a wire's conductor (twisted strands) to a terminal. The proper method/tool for this common wiring repair process is extremely important. Simply "smashing" the section of a terminal around the end of a stripped wire with a pair of pliers is a recipe for future electrical problems. Using the correct crimp process/tool is paramount to having a successful wiring repair.
Heat shrink vs. electrical tape
Heat shrink does as the name implies – shrinks tight around a connection/splice to seal out the elements when heat is applied. Always use the proper size of heat shrink to get the fit you need to seal out the elements. Electrical tape does the same job but often comes unwound from the elements and exposure to common automotive chemicals. Use only high-quality electrical tape, cut to length with scissors/blade, and use clean hands as you stretch the tape (to fit – not break).
Splices and solder
A location where two (or more) circuits are connected to the same (electrical) point. This can range from a pair of wires connected (via solder connections or terminal crimp) to a bus bar where several wires connect electrically in parallel. Whenever making a splice during a wiring repair, never use a "Scotch Lock" splice. These splices damage wires and invite excessive corrosion). I prefer to use solder whenever making a splice and then cover the splice with a heat shrink. There are “butt splices” that can be soldered and those that can be crimped (with the proper crimping tool/technique). Soldering should be performed with enough heat to cause the solder to wick its way throughout the splice/crimp area. The shiny nature of a soldered splice used to be a key indicator of good soldering practices. The elimination of lead in today’s solder has made this observation irrelevant now. Always seal with a heat shrink.
Probing/piercing
These are the two most common methods used in diagnosing electrical/electronic problems with a DMM (Digital Multimeter) or DSO (Digital Storage Oscilloscope). Both methods are areas of disagreement for many techs. Proper diagnostics are important and proper probing methods are essential for:
Getting the correct diagnosis the first time.
Avoiding a comeback by NOT damaging the integrity of a circuit's connections. (Figures 3, 4, 5 and 6)
Piercing a wire’s insulation during diagnosis is a hotly debated topic. Most proponents of this method claim they seal the holes in the wiring insulation created by the piercing probe. While piercing is faster than probing, it often results in at least a few strands of the conductor being broken. Don't we need ALL of the wire strands? If you must pierce to diagnose, please pierce gently, creating as little damage to the conductor's stands as possible, and seal up your insulation holes with tape, ("sensor-safe" only) RTV, or clear fingernail polish!
Conductors
Metals like copper, zinc, tin, gold, silver are conductors, along with steel and iron. Conductors allow current (amps) to flow with very little resistance. All conductors are not created equal. Carbon and graphite are embedded into linen strands to make ignition secondary wires. This material conducts but has some deliberate built-in resistance (for radio interference reduction).
Insulators
Natural rubber is a great insulator. When rubber has carbon-black mixed into it (tires, coolant, and vacuum hoses) to create a black color, the carbon content can allow high voltages (secondary ignition) to conduct through the rubber. Air is another great insulator as long as the voltage level is not high enough to arc the distance. Porcelain, plastic, and ceramic are also insulators.
Short circuits
Electrical current (amps) takes a shortcut (bypassing the intended electrical load), which creates higher than normal current flow (amps) thanks to lower-than-normal resistance. This can result in abnormally high temperatures of the circuit (wiring) and associated terminals/connectors. Any combination of blown fuses, melted wiring, damaged terminals, and melted connectors may result.
Open circuits
Open circuits are the opposite of short circuits. Excessive resistance within that circuit causes little (or no flow) of current (amps). The result is rarely ever any physical damage. Wiring, fuses (and other circuit protection devices) along with terminals and connectors don't mind lower-than-normal current. Proper operation of the electrical loads (modules, motors, relays, light bulbs, etc.) does tend to "mind" if there is little (or no) current (amps) flowing through the circuits and connections powering them up or providing them with the correct information (sensors). Complete circuits
These are what you want in EVERY connection! You want every single electron the circuit (and connections) were intended to travel through to move on through.
Terminal retention
This is the physical force/resistance felt when moving the proper size male terminal in and out of the mating female terminal. How much force? I’ve never seen a spec or tool to measure terminal retention force. It’s one of those learned skills passed down from our mentors. What is the proper size of a male terminal to test with? www.powerandsignal.com is a website where you’ll find most of the wiring and connector suppliers’ information for their products. Often you can identify the terminal you are working on using this website to determine the size of the male pin to use to check the female terminal’s ability to contact its corresponding terminal. Lots of techs make mistakes here by not using the correct male test pin/terminal (Figure 7).
Terminal corrosion – the white/green “dust”
Corrosion, (Figures 8, 9 and 10) from either oxidation (moisture-induced rust) or galvanization, reduces the connection’s ability to carry current (amps) and can result in intermittent, and/or total failure of the circuit. Calcium and magnesium chloride used in road deicing and gravel treatment (to keep the dust down) exasperates the galvanic corrosion problem.
Micro corrosion (a.k.a. terminal fretting) and Stabilant 22a
This type of corrosion is not as common as the green kin. Tiny black pit marks form on the surface of the terminals due to vibration and/or excessive connector disconnects. The damage is very hard to see without a microscope (hence the name micro corrosion). If a visual inspection reveals no obvious corrosion or terminal/connector damage (or wear) and disconnecting/reconnecting a connector seems to make the problem go away for some time, you might try a drop of an electrical contact enhancer product called Stabilant 22A. This is not snake oil. It works very well for those rare cases where connections look and feel good but still have subtle problems. It’s not cheap – so apply a single drop with a needle or back probe pin (not the cotton swab that comes with the product). If you ask your parts WD, they might know about it. It can be challenging to find. Once you use it, you’ll swear by it and keep a bottle (for years) in your toolbox.
Drip loops
Similar to best practices used by phone and cable TV installers, automotive wiring harnesses should allow for a drip loop to be located next to a module. The drip loop will use gravity to pull water away from a module’s harness connector. This should be done so that moisture entrapment and retention at the connector is prevented which could otherwise cause fluid entry into the connector through wicking (capillary) action. If you have to perform any wiring repairs of harnesses that came from the factory with a drip loop, make sure you recreate the loop with the same length of wire you are replacing. Drip loops that are too long can create a “noise antenna” that can transmit or receive interference.
Conductive grease (i.e., nye lubricants)
Often used in certain bearing applications where static electricity can lead to other problems, this conductive grease with a carbon filler will not only lubricate, it will also conduct electricity. Using it on a battery cable terminal to battery post connection is fine. Using it as a moisture barrier grease could create circuit leakage (a low-grade form of a short circuit) in some cases. Another form of conductive grease is Never Seize, used on spark plug threads and exhaust system hardware. It withstands heat and keeps threads from seizing up (as the name implies). Since it also contains conductive materials, it can cause a good electrically insulated spark plug porcelain shell to leak spark under high KV demands if you get even a fingerprint of this lubricant on an insulative surface.
Dielectric grease
The word dielectric implies the material is an electrical insulator. Combine that with the word grease and you have a good lubricant that seals out moisture (a good thing) but also can increase the resistance between two electrical contacts. Lubricate the connector body’s outer portions sparingly – don’t slop it on the actual terminals!
Hopefully, some of these definitions and tech tips will help you keep your customer's vehicles well connected for years to come!
About the Author

Dave Hobbs
Dave Hobbs is a senior technical trainer and curriculum developer for Delphi Technologies Aftermarket at BorgWarner Inc. He's Master ASE-certified with L1 (advanced engine performance) & L3 (hybrid) specialist certifications.
He has extensive OEM service and field engineering expertise, with more than 30 years of experience in troubleshooting vehicle systems electronics, with 15 of those years in the independent aftermarket repair business. He has 20 years of experience in training engineers (worldwide) and service technicians in both the OEM and aftermarket arenas, as well as experience in working with postsecondary vocational / community college students as an adjunct instructor.