Tesla, which was founded in 2003 and released its first vehicle to the public in 2008, is widely regarded as "the new kid on the block." Many shops have been wary of Tesla automobiles with proprietary equipment and technology, mobile service fleets, and fewer moving components in general. Some shop owners have been dissatisfied with Tesla's entry into the market. It is difficult to charge for an oil change when there is no oil to change.
Some perceive Tesla vehicles as a problem, while others see them as an opportunity. Tesla has opened its doors to independent service businesses, providing access to diagnostic software that was previously restricted. Tesla vehicles may be EVs with some distinct characteristic differences as compared to other vehicles we routinely work on, but there are many commonalities. They still have hydraulic brakes, rubber tires and a low voltage system that performs almost everything except provide the car with motive electrical power. However, there are some things that are different about Tesla, that technicians must understand to perform the necessary repairs on these vehicles. It is also critical to maintain safety, as these vehicles, like all other high voltage vehicles, have more than enough voltage onboard to do serious bodily harm or worse. But we are not looking at the servicing of any high-voltage system or components in this article, just regular routine maintenance on systems we are all very familiar with.
Better system understanding is promoted by service information. Consulting service documentation to become acquainted with the systems and components is a great first step. While official service information was previously difficult to obtain, Tesla now makes it available to techs for free at service.tesla.com after setting up an account.
Let’s start with the low voltage electrical system.
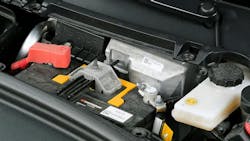
Each Tesla features two batteries: a high-voltage (HV) battery pack and a standard low-voltage battery that powers the car's supplementary systems just like any other car. Tesla used a compact AGM-type 12V lead acid battery until the introduction of the 15.5V Lithium-ion battery pack/module on some 2021 model vehicles. The low-voltage battery can fail or run flat, particularly if the car is left for an extended period and the main HV battery has reached its low energy mode. If the low-voltage battery goes dead, the doors won't unlock, the computers won't turn on, the primary HV battery won't charge and there is no access to the low-voltage system because the hood or frunk (as they are called on EV’s) won’t open because it needs a low-voltage power supply.

What To Do With a Dead 12v Battery
First, gain access to the low-voltage system.
Depending on the model and year Tesla you are working on, there are unusual ways to gain access to the low-voltage system. Newer Model X models feature a removeable panel in the front lower grille area (driver’s side) that is removed using a small screwdriver. Once removed, that cover will expose a set of jumper wires that will be used to release the hood latches. Earlier, Model X had a physical set of positive and negative terminals that were accessed after removing a front grille bezel. Once the wires or terminals are exposed, we can attach a booster pack to them, and the hood latches will release. It is important to note that these wires and jumper terminals only supply power to the electrical hood latches and will not charge the low-voltage battery. The 2016 and up Model S have a set of release cables (left and right) tucked in behind the front inner wheel liners. To open the trunk on these you need to remove some of the wheel liner fasteners to gain access to the cable assembly, allowing you to pull the release that opens the trunk.
Now that we have gained access to the low-voltage system, there are specific differences in how we will boost these systems to get the vehicle to open the doors, enable ready mode and allow the HV battery to be recharged. First, we need to identify what system we are dealing with. We will either have a small 12V AGM battery or a 15.5V Lithium-ion module/battery pack. We will not see either until we remove the cowl and other cover pieces under the frunk to gain access.
To perform a 12V jump start
The basic sequence is as follows:
- Gain access to the 12V battery or the 12V charging point.
- To enable the 12V systems to operate, connect a 12V jumper or charger to the 12V battery. To avoid difficulties, it is recommended to charge the 12V battery for at least five minutes before attempting to do anything with the car, including charging the HV battery using the Universal Mobile Connector (UMC) charging cable.
- After five minutes, connect the car to a car charger or connect the UMC. It is best not to utilize an HV rapid or supercharger at first if using the UMC.
- Charge the HV battery to a reasonable level of charge before driving.
Note: The 12V AGM battery can be tested and replaced just like on a regular non-electric vehicle.
To perform a Lithium-ion jump start
- Gain access to the Lithium-ion battery
- Attach a compatible booster pack for 15.5V lithium-ion batteries to the under-frunk booster terminals and then follow the same procedure as directed in the 12V system.
Note: If the 15.5V lithium-ion battery fails and needs to be replaced, it is a module and will need to be programmed when replaced.
CAUTION: Do not use another Tesla to jump start the vehicle, and don't use another vehicle to boost a weak/dead low-voltage battery on a Tesla, as vehicle damage can occur.

Service Mode
Before performing maintenance on a Tesla, make sure the vehicle is in Service Mode. Service Mode restricts the vehicle's speed to 6 mph, but more importantly it disables remote system access and all cameras. Tesla has equipped their vehicles with Sentry Mode. When Sentry Mode is enabled, a client can remotely activate the vehicle cameras allowing them to observe, communicate and even film what is going on around their Tesla vehicle. Service Mode disables Sentry Mode and disconnects the customer from the Tesla mobile app on their phone. The vehicle will remain in Service Mode until deactivated, so if the tech enters service mode, they need to remember to exit it as well.
Entering Service Mode: Two different methods. Both use the vehicle’s touchscreen.
Method 1: Touch and hold the Tesla "T" icon on the screen for 10 seconds to bring up a pop-up screen asking for a code, which you'll enter as "service." This technique may not work because Tesla's vehicle software is constantly being updated, and certain functions are being shut out or modified, so you may have to use method two.
Method 2: Touch CONTROLS (the car icon) then touch SOFTWARE on the vehicle touchscreen. An image of the car and badge is presented. Hold your finger on the enormous word "MODEL" for four seconds, then let go. Enter "service" into the access code area using the on-screen keyboard, then press OK. The word "SERVICE MODE" is overlayed in red on the touchscreen. Newer touchscreen firmware versions have a red border around the touchscreen edges.
Exiting Service Mode: To exit Service Mode, press and hold the T logo for 10 seconds, then enter "service" in the pop-up box using the on-screen keyboard, and then press OK. This turns off Service Mode. It is essential to exit Service Mode before returning the vehicle to the customer.
Lifting a Tesla
Do not use the vehicle's side rails when lifting or jacking a Tesla. The proper jack/hoist adapters are required. Using the correct lift points and adapters will avoid damaging the HV battery. Tesla lift adapters are readily available online and in the aftermarket. Some Tesla vehicles are equipped with air suspension that must be deactivated before jacking or raising the vehicle on a hoist. To do that we need to enter Jack mode.
Jack Mode Activation
Setting Procedure
- Power up the touchscreen.
- Touch Controls > Service > Jack Mode
Resetting Procedure
- Power up the touchscreen.
- Touch Controls > Service > Jack Mode
Note: Suspension height can only be lowered when all doors are closed.
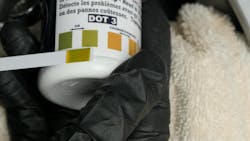
Brake Service
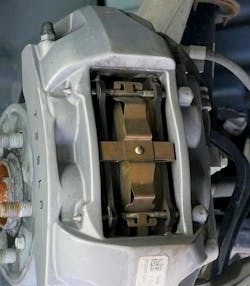
Tesla recommends that the brake fluid be evaluated for contaminants every two years and replaced as needed (Tesla wants the fluid tested at the caliper bleeders.) Tesla also recommends that the front and rear calipers and brake components are cleaned and lubricated every 12,500 miles or once a year if the vehicle is operated in areas that are using road deicers (such as salt). Tesla service information recommends the use of a specific “Silaramic Brake” grease. This grease is a pure silicone dry-film lubricant with a high concentration of a proprietary ceramic lubricant. It is designed to protect in the harshest braking conditions and temperatures. Tesla service information shows the specific lubrication points that this special brake grease is to be applied on the calipers, brake abutments and brake shims and pad backing plates.
While many of the repair methods for replacing brake components on a Tesla are similar to other vehicles, there are some things that are different. Retracting the rear calipers is an example of that.
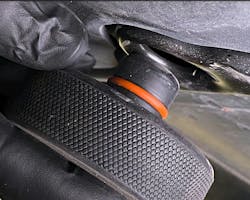
When servicing the rear brakes of a Tesla, you will need to retrack the electric rear calipers to service or replace any rear brake components. There are special tools available to perform this task. Some of these tools are dedicated factory service tools but there are now aftermarket tools that are readily available that will perform this task. For the Model 3, I use a 9-volt battery and caliper cable connector (purchased online), that will easily unwind the parking brake before the caliper piston is pushed back. You can also use the factory scan tool and its bi-directional capabilities to retract the rear calipers, but most shops/techs do not have that technology yet. After a brake service or replacement, the brakes must be properly burnished to ensure proper and quiet braking.
Brake Burnishing
On a straight road, maintain an average speed of 50-55 mph. Apply moderate, steady pressure to the brake pedal to gradually slow the car down to 10 mph. Repeat this technique six times, each time waiting at least 30 seconds between applications to allow temperature reduction.
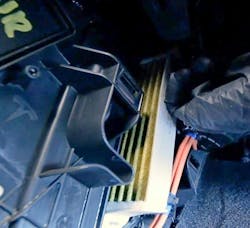
Climate Control
The cabin air filter should be replaced every two years on some models and every three years on others, according to Tesla service information. The location of the cabin air filter will vary. It can be a stacked design like a Nissan, located inside the vehicle beneath the glove box, or it can be mounted in the trunk area under the cowl enclosure. If the Tesla is equipped with a HEPA filter, it is recommended that it be changed every three years. The A/C system on the Tesla (R134a or R1234YF) is an integral part of the climate control of the interior of the vehicle but it also performs a pivotal role in maintaining the HV battery temperature. Because of this dependency on a functional A/C system, Tesla recommends that the A/C system filter and the desiccant bag be replaced at fixed intervals. Tesla recommends an A/C desiccant bag replacement every two years for Model S vehicles produced in 2012-2020 and every four years for Model X vehicles produced in 2012-2020.
Wheel Alignment
Performing a wheel alignment on Tesla vehicles can be very model specific and the need to follow the proper procedure in the information system is important. The newer Model S must be in Jack Mode, while the Model X must be in Service Mode Plus before an alignment can be performed. The Model 3 needs to have 150lb ballast bags on each of the front seats. Following the factory service procedures carefully will ensure the alignment is done properly.
Windows, Doors and Wipers
If a window performs unexpectedly (touches the bright molding, fails to open or close properly, drops more than usual when the door opens, etc.), you can calibrate it to potentially fix the problem.
Calibrating the windows:
- Close the door with the affected window.
- Sit in the driver's seat and close the driver door.
- Use the driver window switch to raise the affected window until it stalls.
- Use the driver window switch to lower the affected window until it stalls.
- Use the driver window switch to raise the affected window until it stalls.
The Falcon Doors on the Model X may also need to be calibrated if they are opened or closed against an obstruction or the low-voltage battery has been disconnected or failed. A warning could be displayed on the dash stating, “Calibration Needed,” indicating the Falcon doors need recalibration.
Calibrating the Falcon doors:
- Clear the area around the back doors and eliminate any barriers (inside and out) before calibrating the doors.
- During the calibration procedure, stay away from the back doors.
Note: Calibration mode overrides the safety sensors, and the doors will not stop if they encounter any obstructions.
- Touch and hold the CALIBRATE button on the Model X touchscreen until the back doors are fully calibrated (the doors will open and close entirely, automatically) and the phrase "CALIBRATION COMPLETE" will appear on the touchscreen.
Note: Both back doors go through the calibration routine at the same time, which takes less than a minute.
- After the calibration routine is finished, hold the Calibrate button for five seconds.
Changing wiper blades:
Changing the wiper blades on a Tesla is like other makes that we see in our shops. The wiper blades are located below the cowl, and we need to enter “Wiper Service Mode” to gain access.
Entering wiper service mode, we will use the touchscreen.
- Shift into Park and turn off the wipers.
- Touch 'Controls' > 'Service' > 'Wiper Service Mode' > 'ON' to move the wipers to the service position.
- Lift the wiper arm a short distance from the windshield, just far enough to access the wiper blade.
Note: Wiper blades do not lock into a lifted position. Do not lift a wiper arm beyond its intended position. Place a shop towel under the wiper arm to avoid scratching or cracking the windshield if it lowers for any reason.
- Turn Wiper Service Mode off on the touchscreen to return the wipers to their normal position.
Tesla vehicles, unlike traditional internal combustion engine-equipped vehicles, do not require oil changes, fuel filters or spark plug replacements. Even brake pad repairs are uncommon in electric vehicles since regenerative braking transfers energy to the battery, minimizing brake wear. This is not to say that there are no chances for service businesses. If your business already services hybrids and other EVs, Tesla should not be too difficult to integrate. There are service opportunities that techs and shop owners can take advantage of on Tesla vehicles that do not involve anything to do with the HV system.
About the Author

Jeff Taylor
Jeff Taylor is a seasoned professional at CARS Inc. in Oshawa with 40 years in the automotive industry. As a skilled technical writer and training developer, he holds licenses in both automotive and heavy-duty vehicle repair. Jeff excels in TAC support, technical training, troubleshooting, and shaping the future of automotive expertise.