Make Lift Safety Routine
Editor's Note: This article was orginally published Sept. 5, 2017. Some of the information may no longer be relevant, so please use it at your discretion.
If you work under vehicles every day, there’s more riding on your lift than cars and trucks. Your safety is riding on it. Go home safely at the end of every work day by making proper lift use part of your daily routine.
Daily Checks
Start every shift by checking over the lift or lifts that you are going to use. The ANSI (American National Standards Institute)/ALI ALOIM (current edition), Standard for Automotive Lifts Safety Requirements for Operation, Inspection and Maintenance, provides the following daily checklist:
- Confirm all lift operating procedures, safety tips and safety materials are accessible and readable.
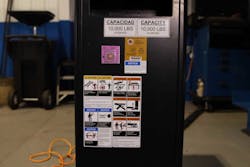
- Ensure all warning labels are accessible and readable.
- Confirm that the lift’s rated load capacity is visible.
- Check that all lift controls are operating properly, including synchronizing systems, restraints and locking devices.
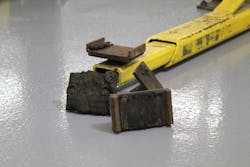
- Look for deformation or excessive wear of any structural components.
- Check for deformation or excessive wear of non-structural components, like hoses, wires or drive chains.
- Check for damage or excessive wear to any lift contact points.
- Look for evidence of hydraulic or pneumatic leaks.
- Have there been any unusual noises, sudden movements, erratic operation or evidence of chips or filings during use?
- Look for cracks or loose concrete around floor anchor bolts (if applicable).
If you find any issues during your daily review, don’t use the lift, and report the situation to your supervisor immediately. The lift should be locked or tagged out of service until the problem is resolved.
Never try to fix or rig a lift that isn’t working properly.
Read the Directions
You’re a professional. You know how to use a lift but not all lifts are the same. Training on how to use the specific lift in front of you is crucial to safe lifting.
Be sure you’ve been properly trained and are familiar with the manufacturer’s instructions for a lift before you use it, especially if you’re using a different lift than usual. Review all lift safety materials, including the warning labels.
Always follow the lift manufacturer’s instructions on how to operate the lift, and use the available safety features.
The Automotive Lift Institute (ALI) recently updated its popular Lifting It Right interactive, online training course for 2017. It’s a great resource for general vehicle lift safety training. Other ALI lift training resources include these publications: the quick reference guide to Vehicle Lifting Points for Frame-Engaging Lifts, Lifting It Right safety manual, Safety Tips and the ANSI/ALI ALOIM (current edition), Standard for Automotive Lifts Safety Requirements for Operation, Inspection and Maintenance.
Copies of all ALI training materials are available from ALI member companies, ALI Certified Lift Inspectors and online at www.autolift.org/ali-store/.
Choose Wisely
Not every lift is suited for every job. Before you pull a vehicle into a bay, make sure the lift is appropriate for that vehicle and the work you need to do. Consider the lift’s rated load capacity, clearances and ability to reach the vehicle manufacturer-recommended lifting points.
Never overload a lift. For example, do not lift a loaded plumber’s truck using a 7,000-lb capacity in-ground lift, and don’t try to do an alignment using a two-post lift. As with any project, match the proper tool or lift to the job.
Choosing the appropriate accessories is also important for getting the job done right. When using some lifts, you may need height adapters to reach the lifting points on pickup trucks and vans.
Never make your own adapters or use wood blocks in their place. This is dangerous and voids your lift’s certification.
If you’re going to be removing major vehicle components – like the engine, transmission or rear axle – use high-reach, supplementary stands to stabilize and equalize the load.
The same high-reach stands can be used when working with cheater bars or when dealing with compressed springs or other forms of stored energy, all of which can cause the vehicle to shift and fall from the lift.
Get to the Point
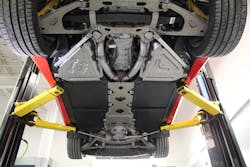
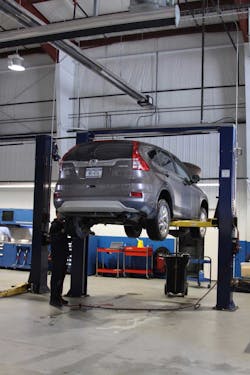
When using a frame-engaging lift like a two-post surface lift, it is crucial to make sure you know where the manufacturer’s recommended lifting points are for the vehicle you are going to service. Don’t just guess and kick the swing arms under the vehicle. You could damage the vehicle or even worse, create an unstable load that could fall and injure you or someone else in the service bay.
The lifting points can be found on the vehicle itself, in your shop service manual or in the ALI annual quick reference guide, Vehicle Lifting Points for Frame-Engaging Lifts, which is supplied with every ALI-certified frame-engaging vehicle lift. Remember that you may need auxiliary adapters to reach some of these lifting points. Only use adapters listed for use with that particular lift.
Let’s Refresh
Here’s a quick refresher on safe lifting practices from ALI’s Lifting It Right:
- Once you have the vehicle properly spotted, raise the lift until the adapters or other supports contact the vehicle.
- Visually check each adapter to ensure it is contacting the recommended lifting point securely.
- Raise the vehicle until the tires clear the ground and then shake the vehicle moderately.
- Visually check to make sure the adapters are still secure. If the vehicle starts slipping or otherwise appears unstable, carefully lower the lift and reposition the adapters.
- Once the load is secure, raise the vehicle to the desired working height and then lower the load onto the lift’s load-holding devices (also known as locks or latches).
- Visually check the adapters once more before going under the vehicle.
Before raising a runway-style, drive-on lift, be sure to chock the tires once the vehicle is properly positioned. Typically, the front and back of the driver side rear tire is chocked.
Whenever you’re using a lift, stay at the controls throughout the lifting and lowering process. Never block open or override the controls or disable safety devices. What may save you a few seconds could cause a serious accident.
Remember, at the end of the day, everyone wants you to go home safely.
The Automotive Lift Institute (ALI) is a trade association of North American-based lift manufacturers (www.autolift.org). Its mission is to promote the safe design, construction, installation, service, inspection and use of automotive lifts.
