How to establish a step-by-step diagnostic process
Most technicians think the beginning of a diagnostic process involves breaking out the scan tool, but that’s not always the case. In order to build a good diagnostic strategy that will work on every vehicle with any type of problem that comes into the shop, you will need to create a process that includes using the right tools, and also one that incorporates obtaining relevant information.
A good diagnostic process will:
- Improve profits
- Create more consistency from all technicians
- Make it easier to explain to your client why you are charging for diagnosis
- Reduce comebacks
- Mis-diagnose fewer vehicles
I have numerous examples throughout my many years in this industry of why a process is beneficial, but I will give you a few that stick out and have made a significant impact as to how we approach any diagnostic process in our shop.
Example 1 – Always duplicate the customer’s concern
Many years ago, I had a customer bring in a Pontiac that she stated stalled when coming to a stop. She left the vehicle with us along with the spare keys. We checked the vehicle over and found it had a very rough idle. The tune-up parts were okay, but the carburetor mixture could not be adjusted to clear up the rough idle. We recommended a carburetor overhaul, after which the car drove fine.
The next day after the customer picked up the car, she called and stated she had the same problem when she went to work that day. We thought that we may need to adjust the choke, so we had her bring it back in and leave it overnight. The next day, we made a minor adjustment and didn’t experience the issue.
The customer picked up the vehicle and was gone no longer than five minutes when she returned again to complain about the car stalling. This is when I decided to go for a ride with her. The first thing I noticed when I got in the passenger side was that she had exchanged the key ring she left us, which only had two keys on it, with one that had a long tether with at least 20 keys and gadgets on it.
She left the lot and, as I expected, the weight of all those keys swung forward when she stopped and shut off the ignition. After that moment we made sure that step one of every diagnosis is to duplicate the customer’s concern, even if they need to drive the car.
Hand in hand with duplicating the problem is asking enough of the right questions to make sure you have enough information to duplicate the issue.
We had another customer that complained of a noise when driving on the freeway. We drove the car and found no unusual noises. We asked the driver to take us for a ride and found that when the car was driven at approximately 75 mph (15 mph over our speed limit) there was a wind noise that occurred, which turned out to be air crossing over the roof rack. Since we don’t drive vehicles over the speed limit, we were unable to duplicate the noise.
Example 2 – Always check the basics
I had a very good diagnostic technician that I relied on to perform most of our emissions and drivability issues. In almost every case, he would diagnose the issue quickly and correctly, but one day he made an error which highlighted some missteps in our diagnostic routine. In short, we did not have a process where every technician used the same steps on every vehicle and followed a set of tests that checked all of the basic mechanical and electrical standards each vehicle must meet.
Every vehicle needs a good battery and charging system in order for all the electrical components to function. Every vehicle needs a mechanically sound engine in order for the computer to function properly. If the engine’s mechanical functions are compromised in any way, the computer can’t do anything to correct it.
My technician made a very common error: he didn’t check the basics at the beginning of his process. In this case, my technician was tasked with diagnosing a check engine light. This car, a Mustang, had a code for a faulty manifold absolute pressure (MAP) sensor. My technician replaced the sensor, then came to me stating that the new sensor was defective and needed another one. Being as this technician was right much more than he was wrong, we ordered another sensor. When the new sensor came, he installed it then came to me saying the car needed a new powertrain control module (PCM).
This is where I stopped him. We have replaced very few computers because we have found computers to be extremely reliable and, in most cases, issues are caused by other factors. I followed the technician to the car where I was going to confirm the need of the PCM. As I was walking by the rear of the car, I noticed a “popping” sound coming from the exhaust. I asked the technician if he had checked engine vacuum with a vacuum gauge. He said he hadn't and just assumed it was okay. We installed a vacuum gauge on the manifold and saw that the vacuum was jumping between 15 to 25 inches of vacuum, indicating a broken valve spring.
A MAP sensor reads engine vacuum and reports it to the PCM. Since the vacuum reading was fluctuating so much, the computer assumed the sensor was faulty and set a code.
As soon as I returned to my office, I sat down and wrote a complete diagnostic process, which included duplicating the customer’s concern and checking the basics like engine vacuum and battery voltage.
I have since evolved our diagnostic strategy to include a three-stage process. Stage one is a system check, including the basics. Stage two is a little more involved with performing some intrusive tests when necessary, such as compression testing or timing belt alignment. If the diagnosis is not clear after stage one and two, a stage three is required where you would perform specific pier to pier or pinpoint tests from the computer to individual components.
By using this approach, we have found it much easier to set a price and explain to the customer what we are doing and provide the results of a diagnostic test to them. Another good reason for a detailed process is that every technician can be trained to perform the process so that every vehicle is tested in the same manner.
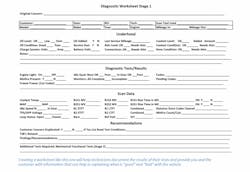
These examples help to explain why a diagnostic process is necessary. In order to implement this process in your shop, first meet with your technicians and ask them how they approach a diagnostic problem. Document these steps, then meet again with your technicians to make sure they are on board with the new, formal process. Once your shop’s technicians are on board, create a worksheet that must be completed as they diagnose vehicles. Documenting the results of their tests will provide you and the customer with information that can be useful in not only diagnosing the issue, but it will help in explaining what is “good” and “bad” with the vehicle.
The good and bad can assist you in charging a reasonable fee for your diagnosis, and quite possibly help you sell additional services.
Understanding why you need to develop a process, and following through with implementing it with your technicians, will pay dividends almost immediately by improving the quality of your diagnostic test procedures.
About the Author

Barry Hoyland
Barry Hoyland has been in the independent aftermarket for more than 45 years as a technician, technician instructor, shop owner, and shop management consultant. He owned and operated a successful Southern California automotive repair center that offers complete auto care and specialized in emission and diagnostic services for over 28 years. Hoyland also owned a company that modified vehicles to perform as emergency response units and mobile command centers, incorporating high-end electronic components into today’s vehicles. Hoyland has experience with all size and types of vehicles including traditional gas, hybrid electric, alternative fuel, and heavy duty diesel trucks.
Hoyland has provided consulting services for many automotive shops, fleets, and government agencies in order to improve their operational efficiencies.
In addition, he has worked with many NHRA drag racing teams as a crew chief on supercharged alcohol and nitro-methane fueled cars and currently serves as a crew chief on a Top Alcohol Funny Car, a Nostalgia Funny Car, and a Nostalgia Alcohol Dragster
Hoyland holds certifications in ASE: A1, A6, A8, and L1, MACS 609, maintains a California Advanced Emission license, and a CDL with endorsements for double and triple trailers, tankers, and HazMat.
When he is not helping to run a shop in the Pacific Northwest, Hoyland travels across the U.S. as an instructor of technical and shop management courses, many of which he has developed.