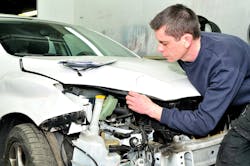
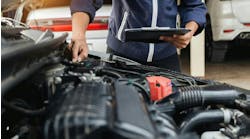
Many shops follow some blueprinting processes by disassembling vehicles to document repairs required and identifying all parts needed to complete each one. Even though their disassembly process is thorough, they can still overlook vital points of focus. This is because removing parts and looking at a vehicle will not let you see everything that is wrong with the vehicle after a collision. There are several critical steps that must be performed before any disassembly to identify damage not visible at first glance.
Health scan
The first critical step to be performed is a pre-repair health scan. Through this scan, which is required by most OEMs, you will identify any faults or error codes related to safety, security, restraint, and advanced driver assistance systems (ADAS). This allows you to document system repairs required by adding diagnostic steps for any identified diagnostic trouble codes (DTCs) that come up during the scan. It is important to know DTCs should not be cleared until the needed repairs are performed and required calibrations are accomplished.
Structural measurement
Another critical step is structural measurement. The purpose of measuring a vehicle’s structure is to identify damage you would not be able to visualize during disassembly. While you will be able to see structure components that are bent in the area of impact, you might not see damage outside of that area. Measurements often show structural distortion in the right rear of a vehicle that was hit on the left front. To locate structural damage, your initial measurement should include the center section, or torque box, and then the outermost four corners of the vehicle. This will identify areas of the vehicle damaged during the collision, direct secondary damage, indirect secondary inertial damage, and specific areas that will require more in-depth measuring. The measurements obtained during this process will help you document the labor required to align the damaged structure.
Suspension alignment
The next critical step is suspension alignment. Depending on the type of structure measuring system you have, this might be able to be performed during the structural measurement process. Many times, suspension components look normal, but when measured they tell a different story. A variance in wheelbase from left to right could be a sign of serious structure or suspension damage. It is important to learn about any suspension concerns during blueprinting, as it is most often expensive to repair and generally you will find more than one damaged item. This is also a good time to inspect mounting locations for damage and misalignment.
ADAS calibration
Reviewing ADAS calibration requirements is also a step often missed during blueprinting. This critical step is needed to identify any systems that were compromised during the collision or might be affected by any repair processes. Many ADAS systems require either aiming, zero-point calibrations, relearn processes and module setup or initialization. A quick check of I-CAR’s Repairability Technical Support Portal will help you identify the systems that might require calibration based on the area of the vehicle damaged. It is important to remember that calibration requirements are not identified by DTCs or malfunction indicator lights (MILs).
OEM repair procedures
Checking OEM repair procedures and your estimating database procedure pages is the last critical step prior to disassembly. Understanding how a manufacturer expects a repair to be performed is important, as it will dictate what precautions should be taken during disassembly and what must be replaced versus repaired. The estimating database procedure pages will help you identify what is included in a procedure and what should be documented as a separate repair process. A review of the repair procedures and procedure pages will also help you identify the skillsets required.
The blueprinting process should identify the who, what, where, why, and how of the repair. Following these critical steps prior to any disassembly will allow you to accomplish that by working smarter and not harder. I have seen vehicles identified as a total loss without performing any disassembly just by scanning, measuring, and reviewing OEM repair processes and estimating database procedure pages. By adding these critical steps to your processes, I hope you can see how they will help you be more effective and efficient throughout the entire repair process and build a more sustainable business model.


