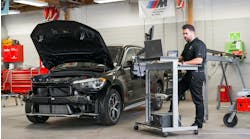
We are always faced with new technology in the automotive industry, and we have no choice but to confront it and learn everything we need to know in order to address future concerns when these systems fail. The knowledge we need to acquire is usually through proper training and a lot of learn-as-you-go, in-depth research on the internet. This may also be coupled with having to buy new equipment to work on these systems and being trained on how to use the equipment you purchase. This was the case when Advanced Driver Assist Systems (ADAS) came knocking on my door. I had no choice but to jump all in and ride this technology like a bull at a western rodeo. I’ve learned to embrace technology, because if you don’t, you may find yourself falling back and losing out on keeping your business on the cutting edge.
One of the most common calls I get in my business about ADAS is radar calibration. These radar systems are usually placed behind the front grille or within the bumper assembly area, putting them in harm’s way during a front-end collision. During the assembly process of a front-end collision, the radar unit may be replaced due to physical damage or reused if the shop decides that the collision impact did not compromise the integrity of the sensor assembly. After all the body and framework repairs are taken care of, it is the shop’s responsibility to mount the radar unit back in its original location and secure the rest of the components of the vehicle. As a precautionary measure, the shop would need to calibrate the radar unit to make sure it will function the way it did prior to the accident and to correct any deviation in operation from its remounted process.
This all sounds so easy, but it becomes an issue when I’m hired to calibrate the radar unit. There are many ADAS jobs during the week for which I will spend the time to set up all my equipment to aim the radar unit at a target, only to find out that it is too far out of spec for any adjustment screws to compensate, or the radar unit may not even be able to find my target. It becomes an uphill battle to climb “Mount Radar” because there are so many different factors that can have an impact on radar calibration failures. I think it is vital to bring them out in the open. It is a constant learning curve that never ends, and my goal is to get to the top of the mountain and learn a lot along the way. I have a whole new game plan now where I physically inspect every radar unit before I even waste time in setting up my equipment.
Shop and vehicle integrity
The first step in my process is shop and vehicle integrity. I must make sure that every shop area in which I perform my radar calibration has a level floor with no pitch or roll in its design. This can easily be checked using a long level with a bubble gauge. The next thing is to check the level on the vehicle itself. I find the best place to check vehicle level is the rocker panel of the door opening (Figure 1). The vehicle should not have a compromised suspension, unmatched tires, underinflated tires or even unwanted weight in the vehicle — which includes people or animals that want to stay in the car while the calibration is in progress.
Radar mount integrity
The next step is radar mount integrity, and I always start my process by grabbing the radar unit and tugging and pulling it to see I can move it at all. There have been many times where I have found loose units because a radar unit popped out of its pivot support or was never properly secured. After the grab check is satisfied, I perform a vertical check of the housing using a level with a bubble gauge (Figure 2). If the housing is off, you will need to check for a damaged bracket or even damaged plastic pivot supports, which was the case on a Nissan I encountered (Figure 3). Once the vertical offset is corrected, then you can fine-tune your vertical adjustment with the radar housing screw. Never use the vertical screw to compensate for a major vertical issue, because these screws, from my experience, usually are made to compensate +/- 2 degrees of correction. When I start to see above 3 degrees on a front radar unit, I begin to look for mounting issues, especially when I'm working on a Honda that needs to see a spec of +/- 0.1 degrees and I want to keep the adjustment screw threads within their normal travel.
Horizontal tilt
The third check would be the horizontal tilt down or up from the floor the vehicle is on, as viewed from the top of the radar unit. This can be checked using a small bubble gauge placed on the housing (Figure 4). There is no screw to compensate this offset, and it will always be a compromised radar housing mounting issue where something is bent. Just be aware that there are certain manufacturers — such as Mazda — that put an internal yaw sensor inside the front radar unit that must be calibrated with the scan tool. Some techs confuse this yaw sensor with the one used for the ABS sensor, which is in a different location, as it is internal to the air bag control unit. So, as you can understand, it is very important to check radar housing mounting integrity.
Housing horizontal sway
Let’s now move on to the fourth check of horizontal sway of the housing. This is the sway of the sensor as you look directly on top of it to see if it is swaying toward the left rear or right rear of the car. Some manufacturers will have a horizontal sway screw adjustment, as Honda does, and yet there will be others that do not have one at all. A drastic offset may be seen by the human eye, but the best way would be to use an angle finder and reference off a component near the radar housing that is a true 0 degrees facing the front of the vehicle. I have been toying around with an angle finder on rear blind spot modules referencing off the rear wheel wells, but it’s still a work in progress (Figure 5). Horizontal sway is a very critical check. I recently had a vehicle I was test-driving slow down on the roadway as an oncoming vehicle on the approaching side of the roadway passed my vehicle. The radar unit was swayed toward the left side of the vehicle, which made it read oncoming cars instead of cars ahead of it. That vehicle left the body shop without a calibration and no codes in the system, but it stored codes later after extensive driving. This led to an unhappy customer returning to the body shop after the repairs.
Radar unit obstructions
The fifth and final checks are characterized as radar unit obstructions. I have seen many vehicles that somehow were assembled with wrong ordered parts. The first was a grille and emblem made of the wrong material and all chromed out (Figure 6). The top correct grille was twice the amount of money and made with a type of plastic that allowed the radar unit waves to pass through. The second was a grille that was made with no provision for an open spot for the radar unit (Figure 7). The correct one is shown on the floor in front of the vehicle, and you will notice a nice opening designed for the radar to look out of. The last obstruction is really nobody’s fault; it’s just Mother Nature at its best. You will get many radar units that may be blocked by debris rising from the roadway, snow accumulation, or a simple icicle, as seen on this Jeep (Figure 8). In all these situations, you will have a radar system that may not function at all, or you may get an error code for “Radar Blocked” or Radar Stained.”
It is going to get more interesting in the coming year with the new mandated rules by the Federal Communications Commission to have all 2022 vehicles equipped with front radar to accommodate Automotive Emergency Braking. The units they are using now for front radar are basically 24 GHz units with one antenna to transmit and receive and will be phased out. The newer units mandated for 2022 with be 77 GHz with three antennas and four receivers with a smaller form factor of 3X. These new radar units will have better velocity resolution using narrower beams for greater accuracy of detecting multiple moving objects and will also offer better range resolution for detecting multiple objects at different positions in the roadway (Figure 9). By having a smaller form factor, we’ll see if engineers will be able to tuck them in safer places out of harm’s way. My hope is that this article has enhanced your knowledge because the future of ADAS vehicles is only going to get more interesting.