STEPS:
1) Recover whatever charge may be present. Note the amount of compressor oil collected.
2) Disconnect the suction hose and liquid pipe from what Toyota calls the "cooler" using SST: 09870-00015 or equivalent tool. Also, remove the heater hoses from the core.
3) Remove the instrument panel sub-assembly with the passenger-side airbag, then disconnect the ducts.
4) Remove the transmission ECU, the ECM, the network gateway ECU, and the A/C amplifier, then the steering column assembly.
5) Use special care when installing the expansion valve on the new evaporator. Use fresh O-rings lubed with ND-Oil 11. Ditto for every other connection.
CUSTOMER CONCERN:
Can't get any cool air
VEHICLE APPLICATION:
2007 Gen II Prius
TOOLS USED:
- Thermometer/Non-contact infrared pyrometer
- Stethoscope
- Scan tool
- A/C pressure gauges
- Smoke machine
- Inspection mirror
- A/C leak detection dye
- UV light
- Electronic leak detector
- Boroscope
- RRR machine
A customer arrives complaining that his or her beloved Gen II Prius is no longer blowing cold air. As always, the first step is to confirm that the problem actually exists using your non-contact infrared pyrometer, perhaps backed up with a mechanical dial-type thermometer. Of course, make sure that your patron knows how to turn the A/C on and set it properly.
That established, next find out whether the impediment to the production of refrigerated air is due to a compressor that’s not turning on, or to the loss of the R134a charge. No, you can’t look at a belt-driven compressor clutch as you’ve always done to confirm the former. While feeling the compressor, or listening to it with a stethoscope, with the A/C off, then on, may give you a hint, that’s somewhat subjective. It’s more sensible to attach your scan tool, which is probably your first inclination anyway.
If you get a fault code, you’ve got a diagnostic landmark that you can look up to get a logical troubleshooting procedure. Regardless, it makes sense to read compressor rpm, which is easily done. If you see zero, you’ve got a control problem – fodder for a future article. If you see a big number – we’ve heard that 9,000 isn’t unusual – you’re probably dealing with a low charge. Normal is in the 2,000 to 3,000 rpm range.
Hook up the A/C pressure gauge
If your troubleshooting style tends toward the mechanical first, you could hold off on the scan tool and hook up your A/C pressure gauges and read them with the system at its coldest setting. No psi difference between the high and low readings points to no compressor activation. The traditional rule-of-thumb still applies: The cold static reading in psi should be somewhere near the ambient temperature in degrees Fahrenheit if a reasonable charge is present. Also, a generally low reading on both sides means the charge is going, or gone.
In the event that you’ve determined that the lack of cold air is the result of a lost charge, the next and most problematic step is finding the point of seepage (it was ever thus, as they say). As a preliminary, give as much of the system as you can see a careful visual exam using a good light and perhaps an inspection mirror. Is there an accumulation of oil and dust anywhere, say at a connection, a service fitting, or on the condenser fins? Are any of the steel lines pitted with rust? By the way, from what we’ve heard, one of the lines near the front of the car that leads to the condenser can corrode badly where it meets the chassis, commonly to the point that it allows refrigerant to gradually escape.
The trouble is, there’s not much oil in these systems – replacement compressors come filled with 3.5 oz., and you're supposed to remove the equivalent amount that you drained from the old one – so it’s not apt to make itself known at a leakage point. This small volume of lube also limits the usefulness of what’s been our favorite means of leak detection for many years: UV dye and a “black” light. There might not be enough of a trace at the condensate tube for you to have confidence in what you’re seeing. Since this method is still excellent for finding other seepage in the system, however, you might as well give it a shot.
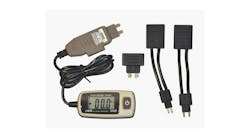
Hybrid vehicle A/C dye injection kits
There are kits tailored to hybrids with electric compressors. These typically include small packets of specialized dye and an especially-powerful light.
Electronic leak detectors? Well, we’ve had a love/hate relationship with them for years – too many false positives. They’re much better than they used to be, however, most meeting J2791, or even J2913, the latest SAE standard. If you can insinuate the tip into the “box” (Toyota recommends removing the blower motor), an alarm signaling the presence of escaped R134a will amount to valuable evidence. Also, make sure you pass the wand over all the other components and connections that contain refrigerant, including the compressor seals.
There are very specific procedures for using these detectors, such as the rate at which you should move the wand, and the proper distance to hold it from potential leak points. Take the time to read the detailed instructions for your model.
Regardless, before jumping to any conclusions, charge the system and use your electronic detector. If the system runs, add dye, let the A/C operate for as long as it takes to get some condensate dripping out of the tube, put on your yellow glasses, and take a close look under your UV light.
Smoke machine will find leaks
As you’re probably aware, it’s possible to use a low-pressure smoke machine to find many kinds of leaks. In this case, however, it would have to be pretty bad to let enough smoke escape to be visible. Still, it’s a possibility.
Finally, there are boroscopes. Their price has come way down while the quality of the view has gone way up in recent years. You can disconnect a duct, or even bore a hole in the air box (which will be easy to seal later) to have an illuminated look around inside. A spreading stain on the evaporator fins, or an accumulation of shiny oil at the bottom would be the tip-off. Or, try it in conjunction with your smoke machine.
All of the above boils down to a process of elimination: There’s no leakage anywhere that can be seen or otherwise detected; ergo, the trouble spot must be at the evaporator, or where the expansion valve connects to it.
If you’ve been methodical, you can be pretty sure of this diagnosis. Sure enough to wager 5.2 hours of labor? We say yes – the charge has to be going somewhere, after all.
The actual R&R procedure is more complicated than some, less so than others (the Gen III Prius rates 7.1 hrs., for example). Your subscription to one of the aftermarket service info websites, or to Toyota’s own tech site (techinfo.toyota.com), will give you the detailed steps and illustrations you need. When it comes to recovering whatever charge is left in the system, we don’t think the tiny amount of ND-OIL 11 POE that’s apt to get into the hoses will amount to an oil contamination issue with the PAG you probably use for everything else. Of course, you should take note of the volume in the oil trap on your machine.
Once you’ve got the evaporator out, look it over carefully, again under a strong light, and you may want to think about the smoke machine again. You might find that the gasket that seals the heat-exchange unit to the expansion valve is actually the leak point. If so, there’s a decision to be made: Given all the labor involved in the job and the relatively low price of a new evaporator, you might want to ask the customer if he or she wants to replace it as a preventative measure. It’s sort of like the policy of replacing the water pump when a new timing belt is installed.
PAG is verboten
After the repair is made, it’s time to tend to the liquid lube situation. The amount of oil in any compressor is important, but it’s even more so with the electric variety. Too much will reduce system heat-transfer efficiency, and too little – well, it’s an expensive component to replace.
So, make sure you put in the same amount as you took out with the remnant of the refrigerant charge. It only makes sense to us to use the specified O.E. ND-Oil 11, not just any generic POE (ester). Get that? No PAG of any kind whatsoever is permitted. It’s not that PAG would actually destroy the insulation on the compressor motor windings. But PAG is hygroscopic, and the moisture it’s apt to collect will make the oil conductive so that there’s potential for it to act as a path to ground, perhaps setting a fault code, or even giving the technician a serious electrical shock. Always remember that the Gen II carries a 201.6VDC battery pack, which is converted to 500VAC with enough amperage to nuke the toughest tech.
Therefore, Toyota (and DENSO) requires that the oil in the system must have less than 1 percent PAG contamination. If your volume of hybrid vehicle repairs justifies it, you could invest in a dedicated A/C machine that never sees anything but ND-OIL 11 to assure that you don’t exceed this limit. A much less expensive alternative that won’t take up any floor space is AirSept’s A/C Charge Guard for Hybrid Vehicles. It allows no more than 100 ppm liquid or other contaminants into the system during recharge, which substantially exceeds the SAE J2788H standard.
Another possibility was suggested to us by several authorities: Since most of the oil present tends to coat the inside of the hoses, you could just keep a separate set that you use only for hybrids.
Always keep in mind that any hybrid or EV is like a vicious electric eel – poised to shock you into a coma or worse if you ever lose your focus and touch the wrong thing. In the case of the Prius, you can feel pretty secure while performing repairs if you disconnect the service plug in the rear of the trunk on the side of the battery module.