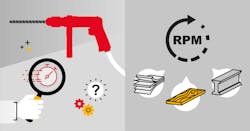
With the right tool, drill bit, and speed, virtually any material can be drilled. Whether you’re drilling through composite material or hardened steel for an oil and gas or metal-working application, the drill’s speed has the most impact on the quality and efficiency.
Below are some top tips to help you drill more effectively and safely.
Effective drilling is all down to speed
First, identify what material you are drilling --
Soft materials such as wood or composite are generally considered easy to drill, and little thought is given to the tool, especially if the drilled hole doesn’t need to be particularly high quality. However, if a hole needs to be drilled with precision, then the correct speed is vital. With the right speed and drill bit, the tool will be able to cut a clean, exact hole with ease.
Hard materials, including hardened steel, alloy steel, or cast iron, are tougher to drill than soft materials. A tool with correct power, torque, and speed is imperative for drilling hard materials. Lower speed and lubrication are success factors here.
You can see the effect drill speed has on an aluminum sheet in this short video.
A question that is often asked is: “Is higher speed better?” Absolutely not. To drill effectively you need to select the right speed for the material you want to drill. If the speed is too low, you risk tearing and ripping the hole. However, if the speed is too high you will not get bite in the material. This is especially true for hardened steel.
The drill bit must be sharp and in good condition. This will also reduce the necessary pressure you have to put on the tool.
“Remember: When you use a low-speed drill, less than 1,000 rpm, the tool can twist your arm if the drill bit gets stuck. This causes many injuries. To protect yourself always use a side handle,” says Harald Odenman, product marketing manager at Chicago Pneumatic.
Calculating the right speed
Here are 4 key steps to define the right speed for your drill:
Step 1: Identify the material to be drilled.
Step 2: Define the drill bit size.
Step 3: Identify the recommended speed of the tool using a drilling speed chart.
Step 4: Select your preferred tool based on factors other than the speed, for example:
- Handle type
- Duty
- Reversible or non-reversible
- Chuck capacity / type / brand
General tips
Here are a few general pieces of advice to follow:
- When drilling a large hole, start by drilling a smaller pilot hole that is half the targeted diameter. It’s not uncommon to use three or four different-sized drill bits to achieve a good finish.
- Take a few seconds to make a good mark with a hammer and center punch. This makes drilling much easier and increases the quality of the hole.
- Let the drill bit cool down between each use and lubricate it during operation. That way it will last longer and drill faster.
- Patience is your best friend for this type of job.
- Double check you are using the optimal drill speed with a drill table.
And don’t forget these safety recommendations when using a power drill:
- Always use a sharp drill bit in good condition.
- Use the drill’s side handle when necessary to prevent the risk of injury.
- Clamp the workpiece firmly, especially if it is small.
- Use safety glasses to protect your eyes.
Information provided by Chicago Pneumatics


