CUSTOMER CONCERN:
Drivability issue
VEHICLE APPLICATION:
2004 Chevrolet Suburban 5.3L Flex Fuel
STEPS:
- Pull the codes
- Basic checks
- Test oxygen sensors
- Propane kit vacuum leak check
- Smoke test the intake
- Replace the gaskets
- Verify repair
Tools Used:
- Repair information service
- Scan tool
- Propane enrichment kit
- Smoke detection machine
General Motors and Flex Fuel go hand in hand. Let’s face it, when anyone hears E85, they instantly think of GM. So what is a common problem people have come across with this fuel type? In this case, the customer brought in his 2004 Chevrolet Suburban 5.3L Flex Fuel, complaining of a drivability issue. The vehicle had a horrible idle and misfired any time the throttle is closed. A quick glance at the dash showed the Malfunction Indicator Lamp (MIL) was on.
Step 1: Pull the codes
The first step, as in any drivability issue, is to pull the codes and freeze frame data. Using a generic code reader, we pulled code P0300 - Multiple Cylinder/ Random Misfire. The freeze frame data showed it to be occurring at an idle and the fuel trims were high. This was an expected reading considering the issues that are occurring with the vehicle.
Step 2: Basic checks
Next come the basic checks. These are the ones that we often overlook. First on the list of basic checks is the visual inspection. Do you see anything that stands out to you? These are the ones that, when missed, may get you nicknames like “Slick” or “Captain Obvious.” As much as we technicians like to heckle each other, misdiagnosing the basics tends to open yourself up for more than typical heckling. It’s best to just automatically do that visual inspection that we tend to overlook so much. Simply stated, don't be Captain Obvious. In this situation, though, the visual inspection came back inconclusive.
Next on the list of basic checks, are the technical service bulletins (TSBs). Using Mitchell1 ProDemand, we instantly found a TSB worthy of checking: TSB number 05-06-04-029A. The definition of this TSB is “Flexible Fuel (RPO L59) Rough Idle, Misfire, MIL DTC P0300 (Install Intake Manifold Gaskets With Teal Green Gasket Material) 2005-06-24.”
The meaning of the TSB indicates that the low volatility of ethanol fuels causes the PCM to push for higher flow, which creates pooling on the upper manifold gasket, and eventually eats away the material and causes unmetered air leaks. This TSB matched our situation perfectly, but unfortunately the TSB tells us to run a straight edge across the intake surface where it meets the heads and check for warping. This is not very feasible in a world where everything we do must be sold to the customer and documented. Without the manifold off the engine, how do we measure it and know for sure that it’s the problem? The solution is, we don't measure it, we diagnose it.
Step 3: Oxygen (O2) sensor testing
Our first test to perform is the oxygen sensor test. This is going to help us with two issues. First is to verify that the O2 sensor is able to meet both rich conditions and lean conditions, and that the sensors are not biased lean, causing a richening of fuel and a rich misfire. Second, it’s going to verify O2 sensor operation for the next test in our diagnosis.
The O2 sensors used on this system are still basic Zirconia O2 sensors that report a “rich/lean” condition. If the voltage reading of the sensor drops below 300 mV, it’s indicating there is an equal amount of oxygen inside the exhaust as there is at its reference point from outside the exhaust. This is indication of a lean condition. If the voltage reading of the sensor rises above 600mV, it’s indicating there is not nearly as much oxygen inside the exhaust as there is at its reference point from outside the exhaust. (It is important to know that O2 sensors work by comparing two points of oxygen, and that many variables can cause this to change; i.e., mud blocking off the reference point, or an exhaust leak causing excessive oxygen in the exhaust.)
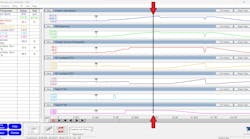
First, we are going to hook up our scan tool. Any scan tool with live data and generic OBDII software will work, but we will be using the Launch X431PAD. Its Bluetooth connectivity, on top of its speed, make it ideal for this type of scenario. In fact, because of its Windows platform with WiFi capabilities, you can be reading the digital version of this article on VehicleServicePros.com from the X431PAD and follow it step-by-step. How can it get any better than that? Also, it has a hanger, so we are going to be hanging it from the hood latch to watch our readings (after making sure the hood shocks will hold up).
After performing your vehicle selection, choose HO2S DATA from the selection. With the X431PAD, you can graph up to 12 selections at once, but in this scenario, we will only really need four, the voltage of all O2 sensors. The pre-cat O2 sensors should be switching from rich (above 800mV) to lean (below 200mV) constantly. Although, due to the current situation, it’s possible to have erratic readings.
Next, we will unplug the brake booster hose from the booster check valve, and hook up the OTC 7148 Propane Enrichment Kit. This is a must have kit for anyone who does emissions testing, especially in California where Bureau of Automotive Repair (BAR) regulation requires the possession of a propane enrichment kit. It’s an easy-to-use tool for testing for vacuum leaks, dialing in carburetors, and checking O2 sensor response time.
With our X431PAD hanging from the hood latch, we must watch the O2 sensor readings. When we push the button on the propane enrichment kit, we want to see the reading go up to nearly 1V, showing that the O2 sensor is picking up the lack of oxygen in the exhaust due to addition of fuel. In this case we did. When we release the button, we want to watch it drop to near 0V. In this case it did. We now know that the O2 sensor is capable of picking up both rich and lean conditions.
It is important to note that using a scan tool is not a proper way to see if the O2 sensor is responding as quickly as it needs to and that must only be done with an oscilloscope hooked up to the O2 sensor. We are only verifying that it is not a biased sensor.
Step 4: Propane Kit Vacuum Leak Check
Our next set of procedures is to check for vacuum leaks. First, check fuel trim data on your scan tool. If long term fuel trim percentage is high at idle, but drops down to nearly zero as the rpm rise up, this almost certainly indicates your problem is a vacuum leak. For us, our long-term fuel trim went from 19 percent at idle and slowly dropped to about 5 percent at 2,500 rpm. This is a clear indication that we have a good-sized leak.
(Unrelated tip: On GM vehicles, if you encounter an EVAP incorrect purge flow issue, and your fuel trims are extremely elevated at idle, check the hose between the purge valve and the intake manifold. A failure of this hose will not only cause a vacuum leak / lean idle, it will also lose the vacuum needed to purge the EVAP system).
The next step is to watch the O2 sensor graphs, and use the OTC 7148 Propane Enrichment Kit to find where the leaks originate. While holding the button on the enrichment kit, sweep the end of the hose along the intake manifold where it meets the cylinder head. In our case, the rpms rose up and all the O2 sensor readings pegged out at .990 volts. We have confirmed that the manifold gaskets are leaking and can prepare for our next step.
Step 5: Smoke Test the Intake
The propane test is a great way to quickly decipher whether or not you are dealing with a vacuum leak and whether or not to proceed towards that direction or move towards something else. However, it is not conclusive on where the vacuum leak originates. So for this we will need the assistance of a smoke machine We will be using the Redline Smoke Pro Total-Tech. It is small and easily hung from the hood latch. We will put away our Launch X431PAD at this time and I will stress the importance of remembering to remove the dongle from the car and put it away with it. You do not want to forget it.
Redline Detection also recently released a useful tool for leak testing. It is the Easy Intake. Instead of trying to find a good vacuum line to hook up the smoke machine to, and having to put a plastic bag on the intake air boot, or having to figure out the giant cone, this simple tool is just put into the air boot right after the mass air flow sensor. You insert the Easy Intake, and a hand pump lets you start pumping it up. When the tool is filled with air, it expands and blocks off the intake boot and seals so the smoke cannot escape. It will mold to any sizes orifice. (For more information on the Redline Detection Easy Intake tool, visit VehicleServicePros.com/11376405.)
The tool has a small hose going through it for your smoke machine to fill up the intake. After a minute or two of filling up the intake with a thick, smoke solution, we are able to see the smoke escaping from the intake manifold gasket. After a full visual inspection, it seems this is the only place it is coming from and it is safe to say that, the gasket is faulty.
Step 6: Replace the Gaskets
According to the TSB, there is an updated gasket to keep from deteriorating. It holds up a lot more to E85. Before selling the job, though, check all the hoses, as well as the PCV for wear and possible deterioration. Even go the extra mile to test the PCV. It only takes an extra minute or two but the payoff is worth it. Have you ever quoted a customer a price, then had to call them four to five times throughout the job to tell them something else broke and it’s going to cost a little extra? Or how about the people who just add them to the bill without telling the customer? Those scenarios never end up good, so it’s always best to note the possible problems that will go with the job and explain them to the customer before you start. This will not only build customer trust, but it will also create the confidence that you have done this job more than once and know what could happen.
Step 7: Repair Verification
This step tends to go out the window for so many technicians, yet it’s the most important part of the job. The verification. When fixing vacuum leaks, it’s best not to clear the MIL right away. After performing the repair, watch your fuel trim upon start up. In our case, as soon as the O2 sensor warmed up and the system went into closed loop, the fuel trim started to drop. We let it run for about 10 to 20 minutes while doing something else, and when we came back, long term fuel trim was down to 3 percent and the idle was smooth as can be. We went into “misfire data” on the scan tool and saw zero misfires on all cylinders. This shows we did the job right and we can clear the light, and send the vehicle back to the customer, being satisfied that we did a great diagnosis, and great repair. Once again, complete system knowledge and the right tools, have created a perfect fix scenario as well as a very grateful and lifelong customer.