Editor's Note: This article has been updated from its 2015 version.
Most hybrid manufacturers do not recommend the use of a vacuum bleeder, but using either a pressure bleeder with the correct adapters or bleeding manually are approved procedures. Either bleeding method will require the use of a scan tool in order to bleed the system properly.
Even though there are some manual bleeding procedures that may be used without a scan tool, using a bi-directional scan tool to make sure all of the ABS solenoids have been activated will allow the brake fluid to flow through the entire system and ensure all the air is out of the system. Follow the manufacturer's recommended procedures by obtaining the information from your repair information source (specific to the vehicle), as well as bleeding and reactivating the system procedures performed in the correct order.
For the Highlander, we will use the Toyota TechStream scan tool to go through the entire bleeding and reactivation process. As with most “active” tests and procedures, using any aftermarket scan tool with bi-directional capabilities is just as efficient as the factory scan tool. Most active, or bi-directional functions, performed with any scan tool use the programming within the vehicle’s software to activate tasks within the module you are working with.
After performing your brake repair, assure adequate battery voltage support is present and bleed the system using the following procedure:
- Use only the appropriate brake fluid, whichever is specified in service information.
- Fill the reservoir to assure the fluid remains between the “min” and “max” lines during the bleeding process.
- Make sure the EBC is disabled while using the scan tool.
- Move the shift lever to the “P” (Park) position and apply the parking brake.
- Connect the scan tool to the DLC with the ignition “off.”
- Turn the ignition “on” and start the scan tool (DO NOT start the engine).
- Go to the following menus:
- Diagnosis
- OBD/MOBD
- ABS/TRAC/VSC
- ECB Utility: ECB Invalid. This turns off the Electronic Brake Control so air cannot enter the actuator when the pump runs which will make it more difficult to bleed the system
You are now ready to initialize the bleeding sequence. Using the scan tool enter the following menus:
- Diagnosis
- OBD/MOBD
- ABS/TRAC/VSC
- Air Bleeding. Select “Usual” if just the front or rear brakes have been installed or repaired.
Bleed the brakes in the order listed in your repair information (in this case: left rear, right rear, left front and right front). Repeat the procedure until all of the air is completely out of the system.
Steps for manually bleeding the brake system
- Assure adequate battery voltage support is present
- Depress and hold the brake pedal. Allow the solenoid to operate for approximately 30 seconds, with the brake pedal depressed, bleed the rear brake system using the bleeder screw on the left rear disc brake caliper while the pump motor and solenoid are operating. Repeat the procedures until air is completely bled from the left rear caliper. Repeat the entire process on the right rear. The ECB warning light will come on and the buzzer will sound while bleeding, but that does not indicate a malfunction.
- Follow the procedure in the same manner for the front brakes, starting with the left front, then the right front.
- When finished install the two relays back into the brake controller and cancel the “EBC Disable” function using the scan tool.
- Clear DTCs.
- Perform Accumulator Zero Down with the scan tool. This allows the correct amount of fluid to remain in the reservoir and accumulator. Perform accumulator zero down by following the steps displayed on the scan tool. The procedure to perform the zero-down is the same as disabling the EBC with your scan tool, with the added step of selecting “Zero Down” within the ECB Utility menu.
- Accumulator pressure will be released and accumulated repeatedly, which allows the fluid inside the accumulator to circulate. The pump motor pressurizes the accumulator every time the ignition switch is turned from off to on, doing this four or five times will assure all of the air is removed from the accumulator and will allow proper filling of the reservoir. After performing accumulator zero down (accumulator depressurizing), return the fluid in the accumulator back to the reservoir by turning on the key and adjust the fluid level in the master cylinder reservoir to the “max” line.
If the Zero Down procedure is not performed, the accumulator will return fluid to the reservoir and could overfill the system.
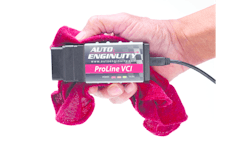
In this case, we used the TechStream scan tool, but many of the aftermarket tools will work just as well, if not better. Aftermarket tools, such as the AutoEnginuity, in many cases work faster than a factory tool. This is primarily due to the technician being more familiar with the tool because he or she is more adept at using it. In addition, most aftermarket tools boot up faster than a factory tool and are ready to function much quicker than a factory scan tool.
Finalize the job by clearing DTCs and road testing the vehicle to make sure the customer’s concerns were resolved.
This process is featured in the Tool Briefing article Maintaining and repairing electric braking systems.


